19 January crafts for preschoolers, each with a picture and simple steps. Easy ideas for ages 3 to 5 using paper, paint, and glue.
January is the month the house stays shut, and the craft drawer earns its keep. Here are 19 January crafts for preschoolers, each with a picture, supplies, and steps, and most use paper plates and cotton balls.
A three-year-old glues cotton balls into the three circles of the cotton ball snowman and stamps fork-painted fireworks for New Year. A five-year-old snips a coffee filter snowflake and hangs the pinecone bird feeder outside, then checks the window all afternoon. The snowman ends up on the fridge.
Start here: three January crafts that always work
19 January crafts for preschoolers, with pictures
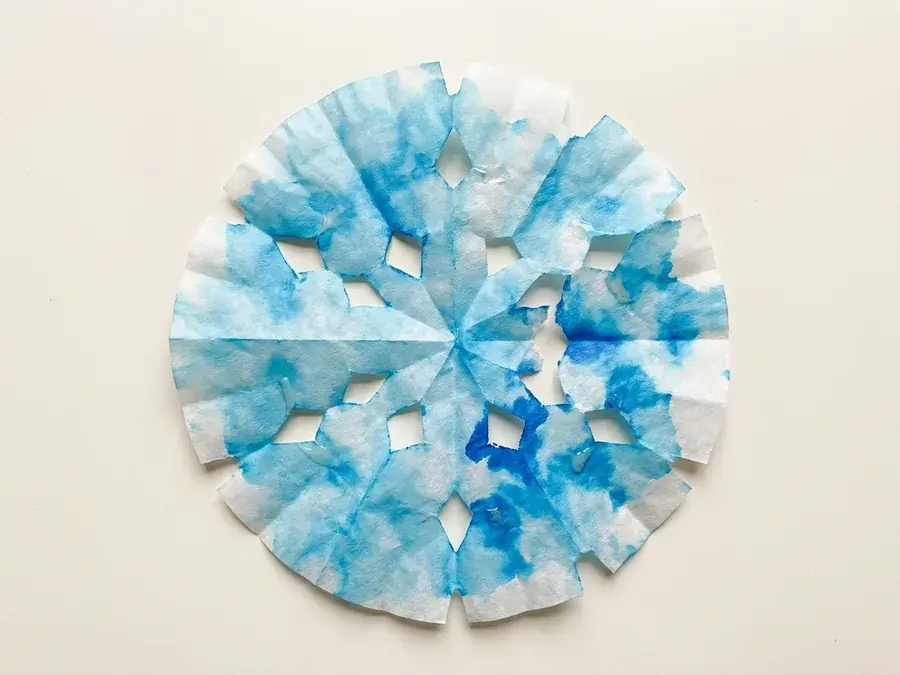
1. Coffee filter snowflake
The child folds a coffee filter, snips notches from the edges and opens it up, optionally colouring it blue first.
Fits January: Winter and Coffee filter.
You need: 1 round coffee filter, blue marker, water in a small cup, spoon or dropper
How to make it
- Your child scribbles on the coffee filter with the blue marker.
- Drip water on it so the ink spreads into soft blotches. Let it dry.
- You fold the dry filter into a wedge.
- Snip small triangles from the folded edges.
- Open it up flat.
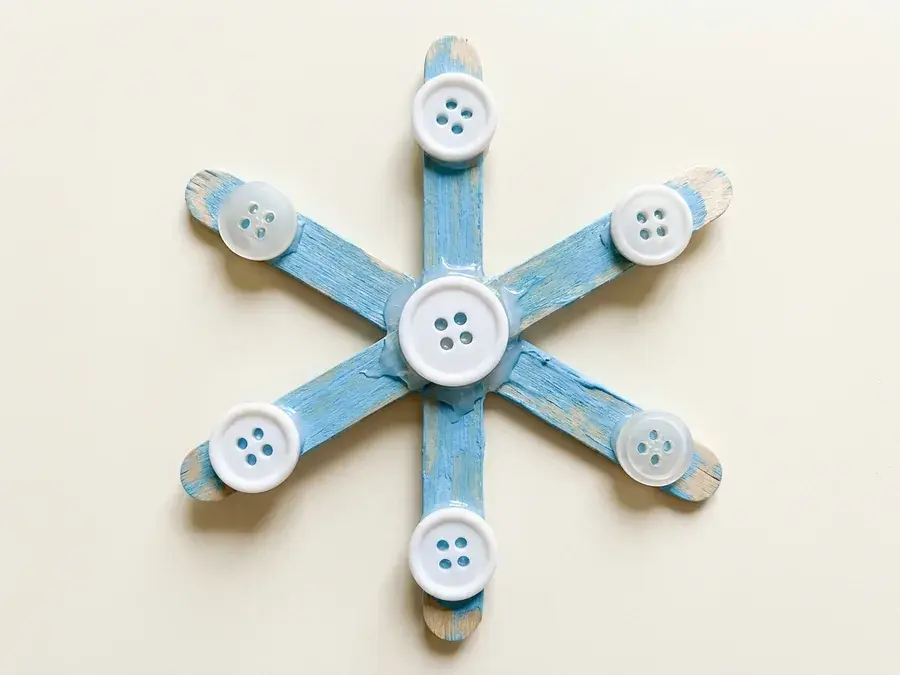
2. Craft stick button snowflake
The child paints craft sticks, crosses them into a star and glues buttons or sequins along the arms.
Fits January: Winter and Christmas.
You need: 3 craft sticks, light blue poster paint, 7 white buttons, glue
How to make it
- Your child paints the 3 craft sticks light blue. Let them dry.
- Cross the sticks over each other at their middles and glue them to make a star with 6 arms.
- Glue 1 white button flat on the center.
- Glue 1 white button on the end of each arm.
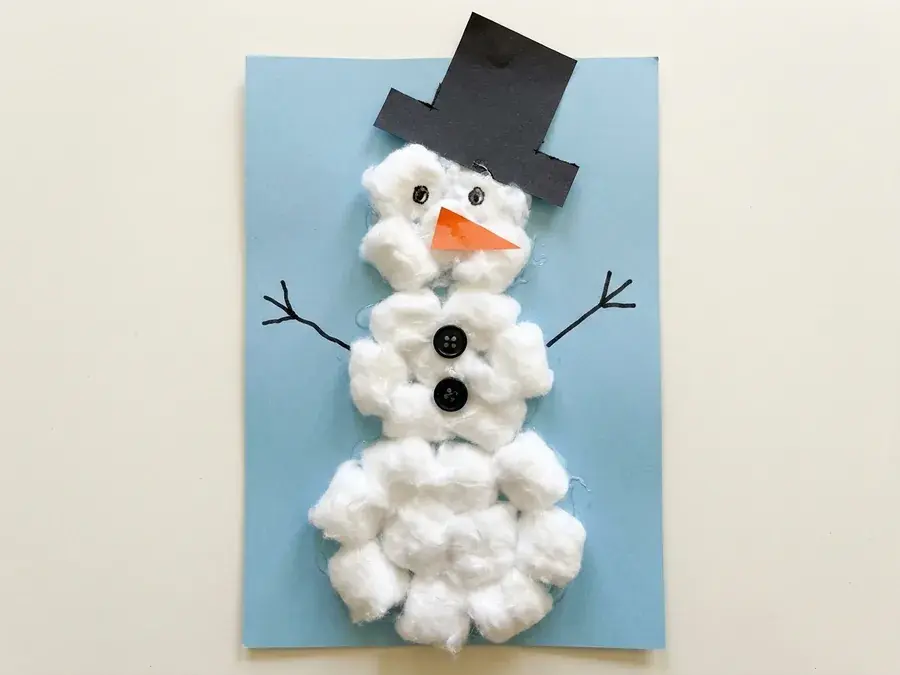
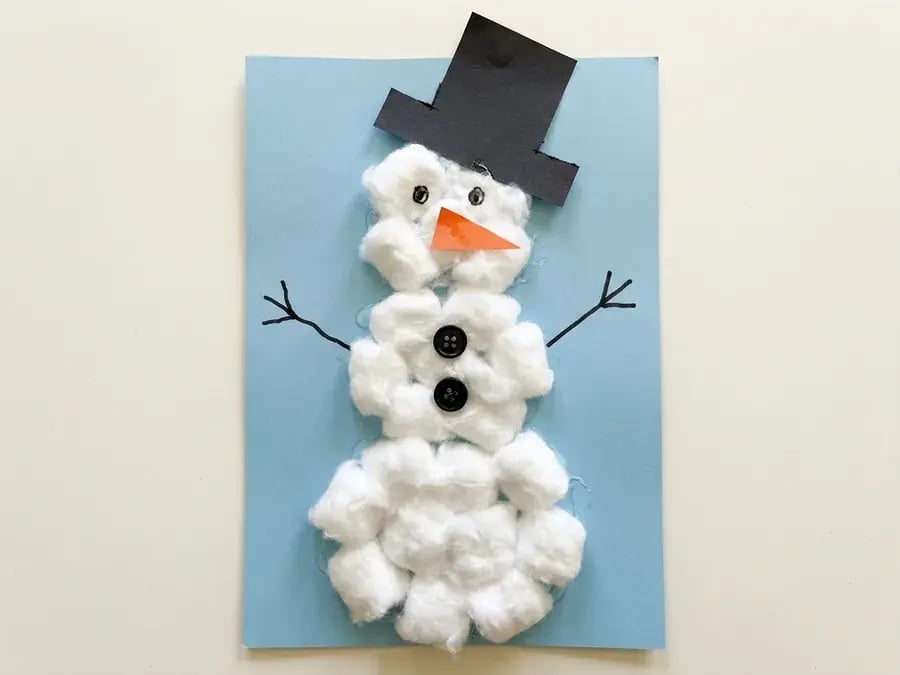
3. Cotton ball snowman
The child glues cotton balls inside three drawn circles on blue paper, then adds a paper hat, carrot nose and stick arms.
Fits January: Winter and Snowman.
You need: light blue paper, cotton balls, black paper, orange paper, 2 small black buttons, black marker, glue
How to make it
- Your child glues cotton balls in 3 round clumps, one above the other: small on top, medium in the middle, large at the bottom.
- You cut a black hat and a small orange triangle. Glue the hat above the head and the triangle on the head as a nose.
- Glue the 2 buttons on the middle clump.
- Draw 2 dot eyes above the nose and 2 stick arms out from the middle clump.
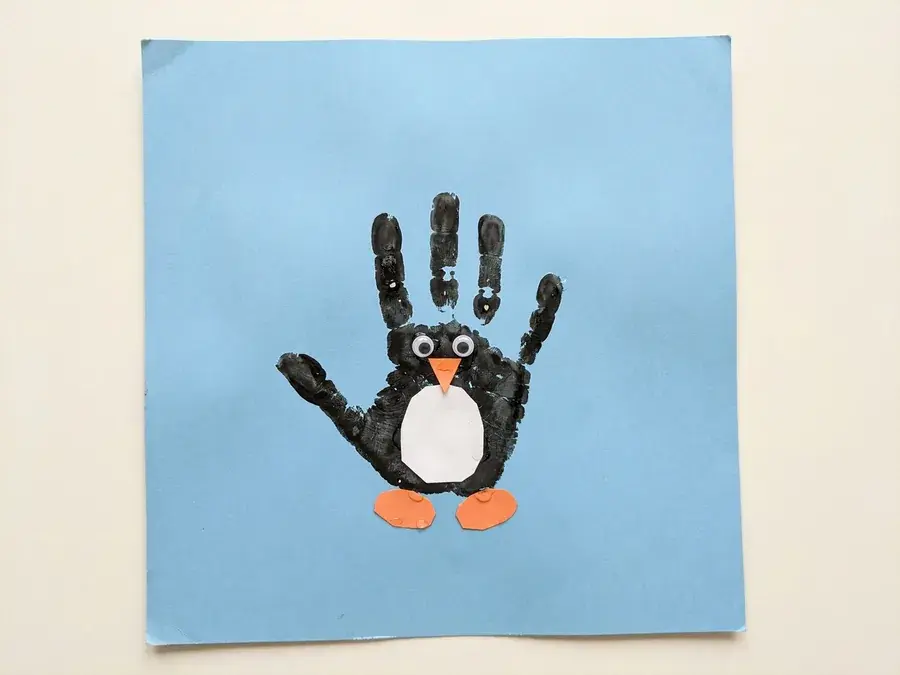
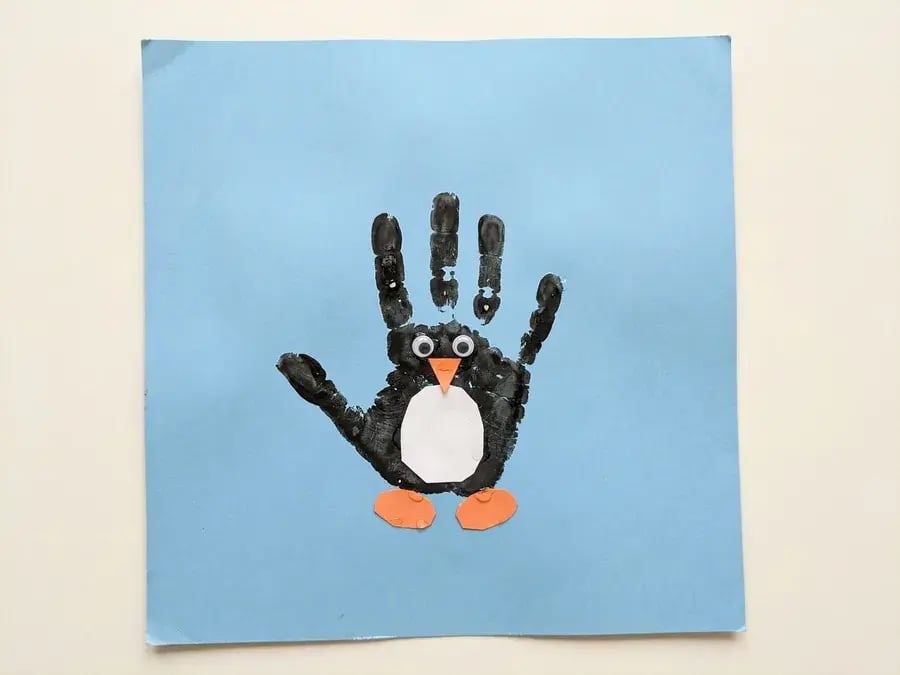
4. Handprint penguin
The child prints or traces a black hand as the penguin body, then adds a white belly, eyes, beak and feet.
Fits January: Winter and Handprint.
You need: black paint, white paper, 2 small googly eyes, orange paper, glue, light blue paper
How to make it
- Paint your child's hand black. Press it in the middle of the paper with the fingers together pointing up and the thumb out to the side. Let it dry.
- You cut a small white oval and glue it on the palm as the belly.
- Glue the 2 eyes on the fingers above the belly. Cut a small orange triangle and glue it below them as a beak.
- Cut 2 small orange feet and glue them right below the palm.
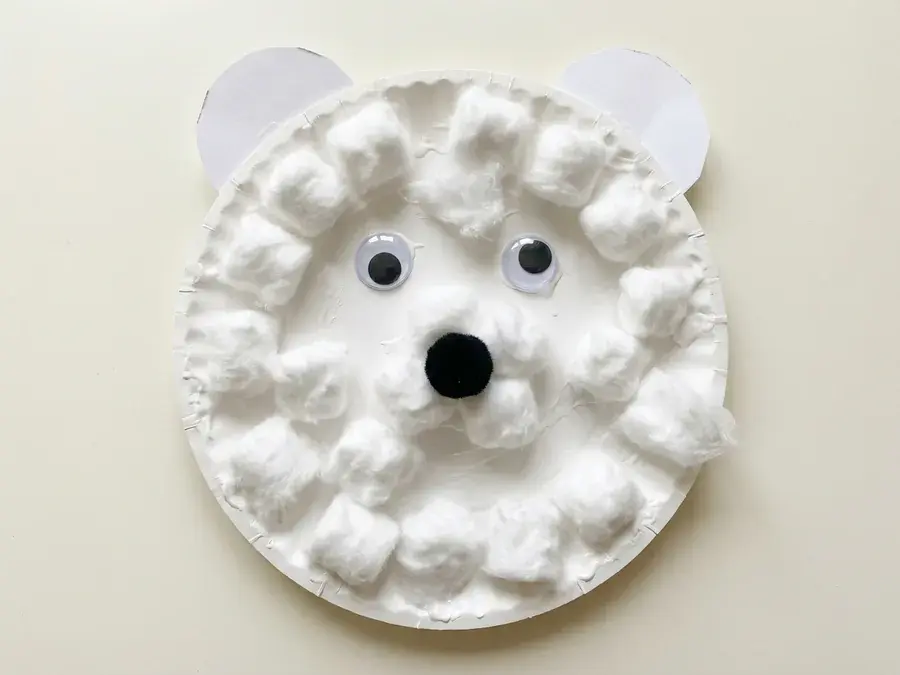
5. Paper plate polar bear
The child covers a paper plate with cotton balls or torn white paper and adds ears, eyes and a black nose.
Fits January: Winter and Paper plate.
You need: 1 white paper plate, about 20 cotton balls, 2 white paper half circles, 2 large googly eyes, 1 black pom pom, glue
How to make it
- You cut 2 half circles from white paper. Glue them behind the top rim, one on each side, as ears.
- Your child glues about 20 cotton balls all over the front of the plate.
- Glue the 2 eyes on the plate in the upper half.
- Glue the black pom pom in the middle as a nose.
6. Paper plate penguin
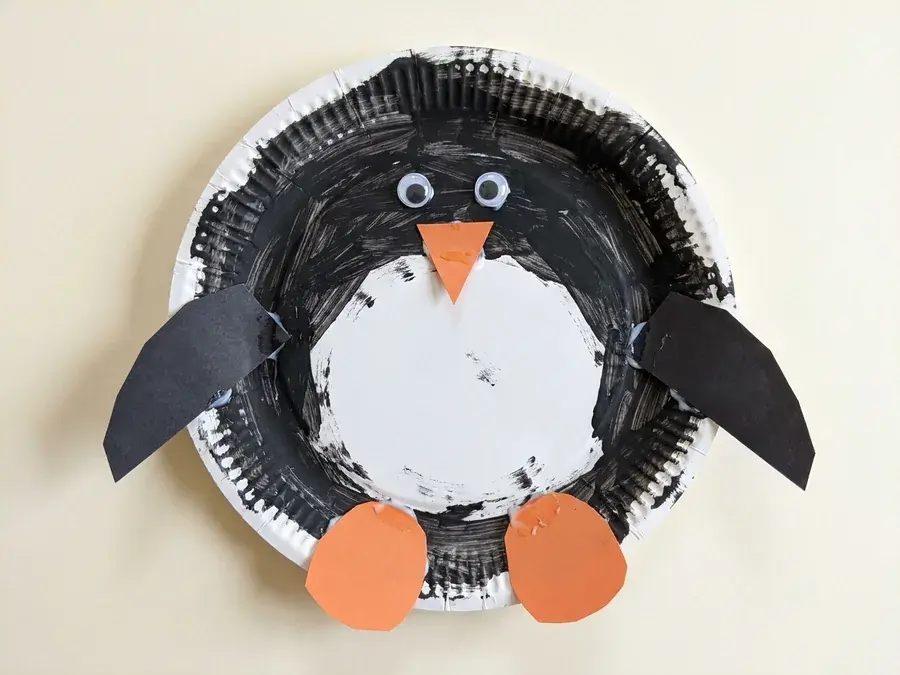
The child paints the rim of a plate black, leaves a white belly and glues on eyes, an orange beak, feet and flippers.
Fits January: Winter and Penguin.
You need: 1 paper plate, black paint, black paper, orange paper, 2 googly eyes, glue
How to make it
- Your child paints the rim and top part of the plate black, leaving a white belly in the middle. Let it dry.
- You cut 2 black flippers, an orange beak and 2 orange feet.
- Your child glues the 2 eyes near the top on the black part, and the beak below them.
- Glue a flipper on each side pointing down, and the feet at the bottom edge.

7. Paper plate snowman
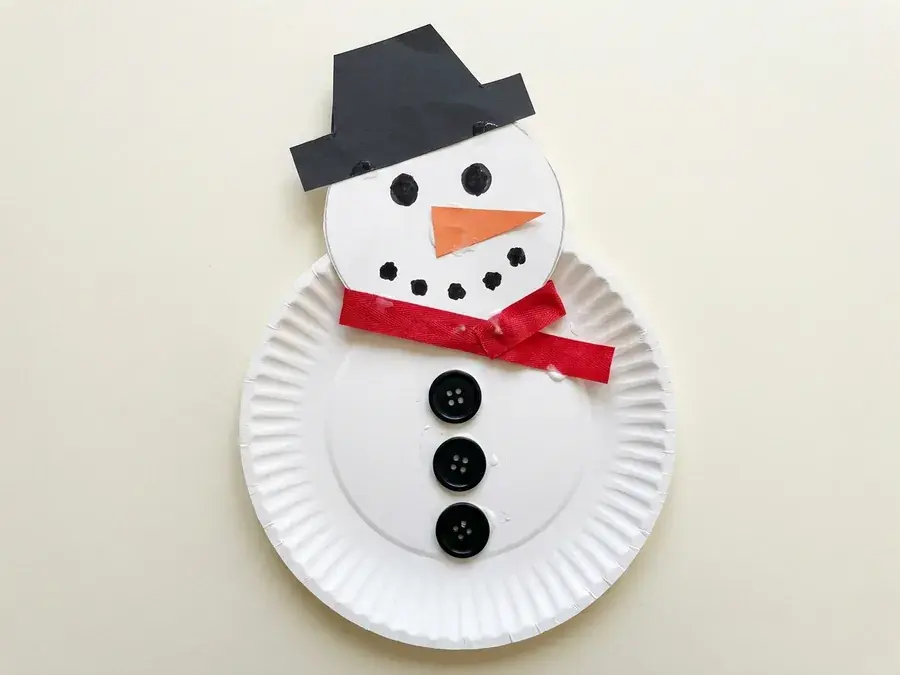
The child joins two or three paper plates and adds a paper hat, scarf, buttons and a carrot nose.
Fits January: Winter and Christmas.
You need: 2 white paper plates, black paper, orange paper, 1 piece of red ribbon, 3 large black buttons, black marker, glue
How to make it
- You cut the ridged rim off one plate, leaving the flat middle as a smaller head.
- Glue the head so it overlaps the top edge of the whole plate.
- Cut a black hat and glue it on the head. Glue the red ribbon across the join as a scarf.
- Cut an orange triangle and glue it on the head as a nose. Draw 2 dot eyes and a dotted smile.
- Glue the 3 buttons in a column on the body.
8. Pinecone bird feeder
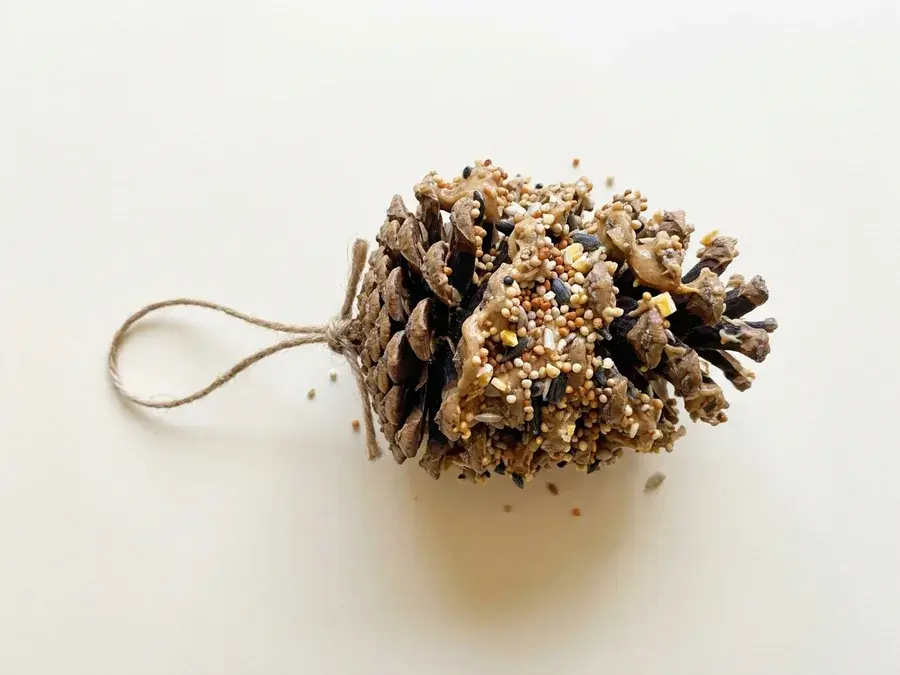
The child spreads nut or seed butter on a pinecone, rolls it in birdseed and hangs it outside.
Fits January: Winter and Fall.
You need: 1 large pinecone, sunflower seed butter, mixed birdseed, 1 piece of twine
How to make it
- You tie the twine around the top of the pinecone and knot it into a hanging loop.
- Your child spreads seed butter over the scales of the pinecone.
- Pour the birdseed on a plate. Your child rolls the pinecone in it until seeds stick all over.
- Hang it outside from a branch.
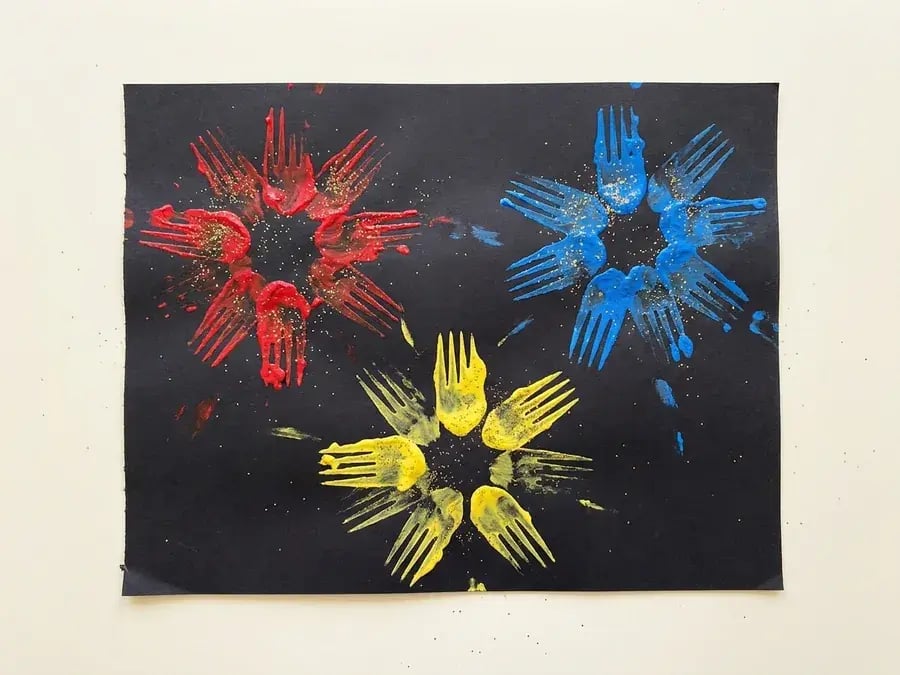
9. Fork painted fireworks
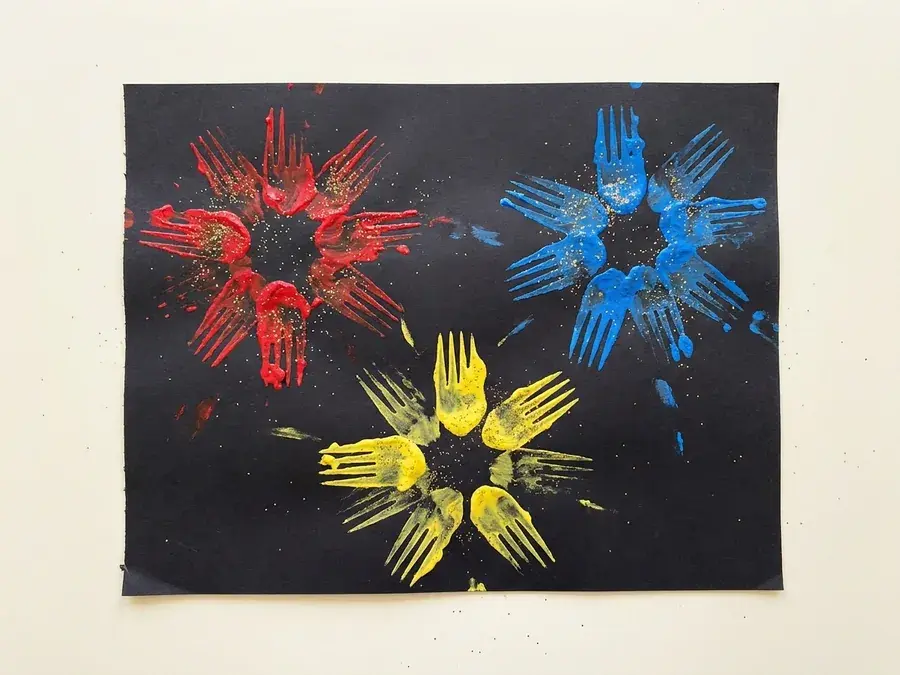
The child stamps a fork dipped in bright paint outward from a centre on black paper to make bursting fireworks.
Fits January: 4th of July and New Year's.
You need: 1 sheet of black paper, 1 fork, red, blue and yellow paint, gold glitter
How to make it
- Dip the back of the fork in paint.
- Your child presses it again and again on the black paper, prints pointing outward from one centre point, to make a round burst.
- Make more bursts in the other colours.
- Sprinkle gold glitter over the wet paint.
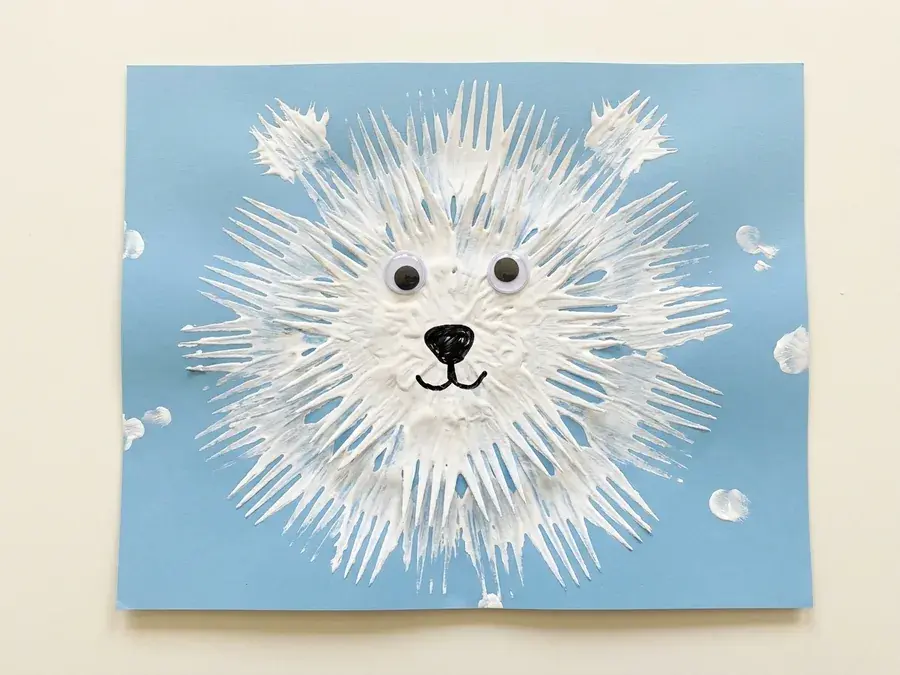
10. Fork painted polar bear
The child stamps white paint outward with a fork around a face on blue paper to make shaggy polar bear fur.
Fits January: Winter and Bear.
You need: light blue construction paper, white paint, metal fork, 2 googly eyes, black marker
How to make it
- Pour a little white paint on a plate.
- Your child dips the fork and presses it on the blue paper, with each print pointing outward from one center spot.
- Keep stamping round and round until a shaggy white circle about a hand span wide forms, thicker in the middle.
- Add 2 small tuft prints at the top as ears. Let it dry, then glue on the eyes and draw a black nose and a smile.
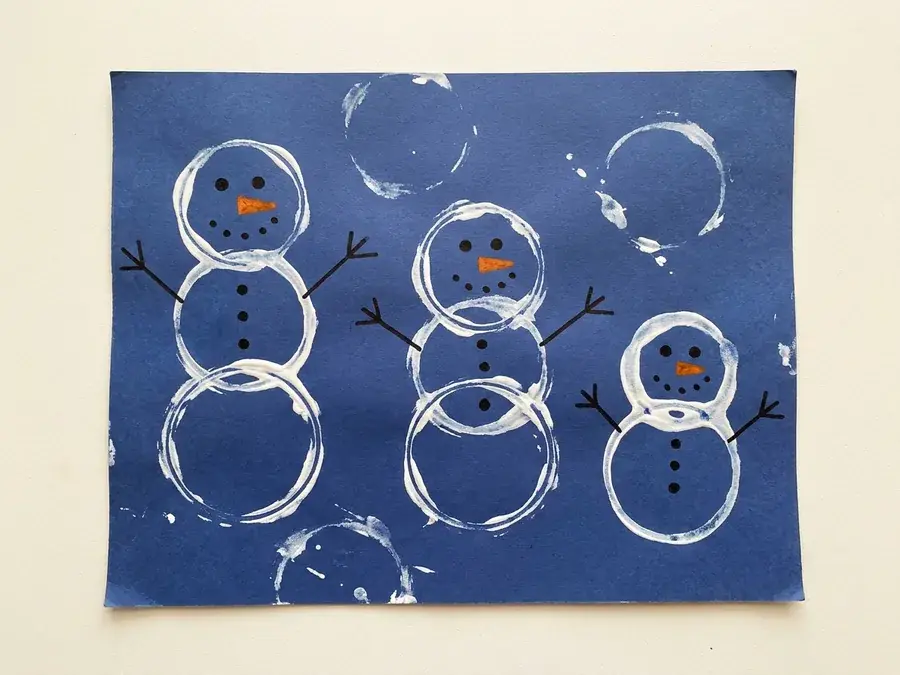
11. Toilet roll stamped snowman family
The child dips the end of a cardboard tube in white paint and stamps stacked circles to build a family of snowmen, then draws faces and arms.
Fits January: Winter and Christmas.
You need: 1 sheet of dark blue paper, white paint, 1 cardboard toilet paper roll, black marker, orange marker
How to make it
- Dip the open end of the roll in white paint. Your child stamps rings on the blue paper.
- Stack the rings into snowmen of different heights, side by side. Let it dry.
- On each top ring, your child draws 2 dot eyes and a smile in black marker and a carrot nose in orange.
- Draw 2 black stick arms from each middle ring.
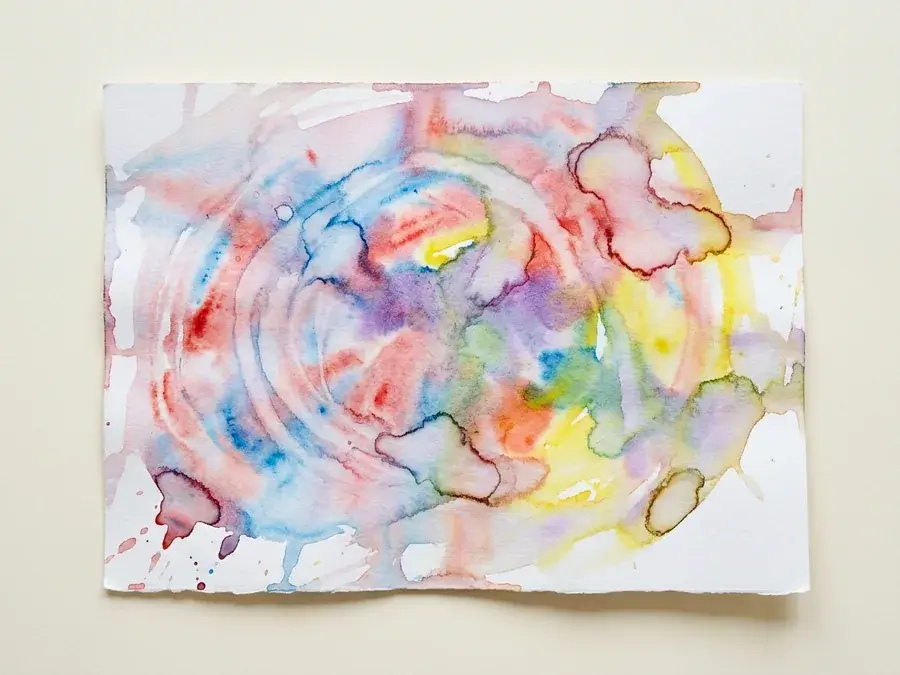
12. Ice painting
The child paints with frozen coloured ice cubes on sticks, or paints watercolour onto a block of ice.
Fits January: Winter and Five senses.
You need: thick white paper, coloured ice cubes, tray
How to make it
- You colour water red, blue and yellow with food colour and freeze it in an ice cube tray with craft sticks in them, ahead of time.
- Lay the paper flat on a tray. Your child slides and rubs the ice over it while holding it like a brush.
- Watch the colours run together. Let the paper dry flat.
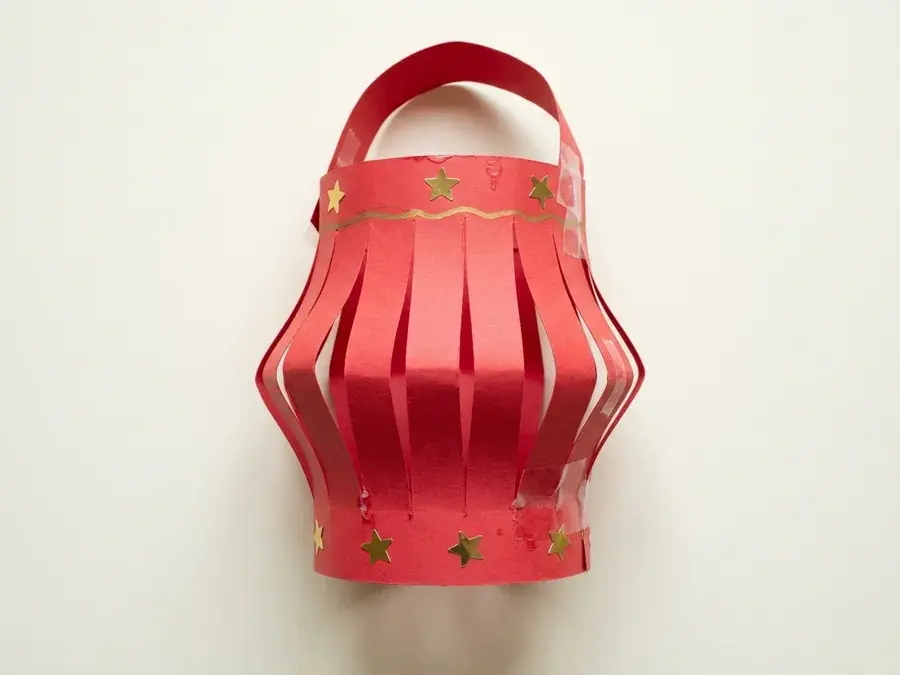
13. Paper lantern
The child decorates a sheet of paper, it is folded and snipped along the fold, then rolled and a handle added.
Fits January: Christmas and Chinese New Year.
You need: red construction paper, 1 strip of red paper, gold star stickers, gold marker, clear tape
How to make it
- Fold the red sheet in half lengthwise. You snip straight lines from the fold toward the open edge, stopping before the edge.
- Unfold it and roll it into a standing tube.
- Tape the red strip across the top as a handle.
- Your child sticks gold stars on the top and bottom bands and draws a wobbly gold line along the top.
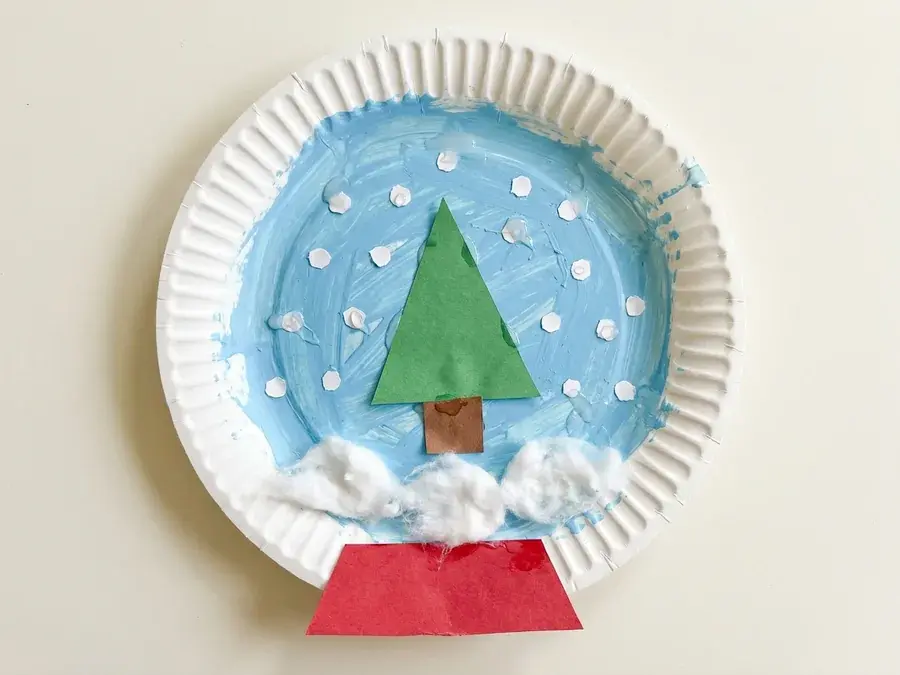
14. Paper plate snow globe
The child draws or glues a small winter scene on a plate, sprinkles on paper snow or glitter and adds a paper base.
Fits January: Winter and Christmas.
You need: 1 white paper plate, light blue poster paint, green paper, brown paper, cotton balls, white paper, red paper, glue
How to make it
- Your child paints the flat centre of the plate light blue. Let it dry.
- You cut a green triangle and a small brown square. Glue the triangle in the middle of the blue circle, with the square under it as the trunk.
- Pull cotton balls flat. Glue them along the bottom of the blue circle as snowy ground.
- Your child glues small white dots around the tree as falling snow.
- Cut a red trapezoid and glue it under the bottom rim of the plate as the base.
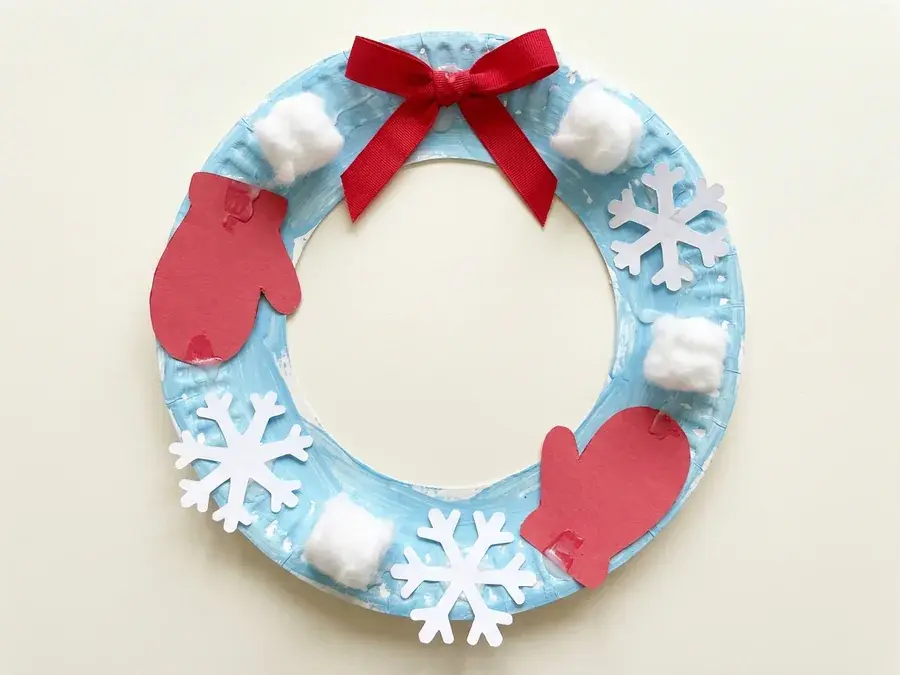
15. Paper plate winter wreath
The child glues snowflakes, mittens and other winter cut-outs around a paper plate ring.
Fits January: Winter and Christmas.
You need: 1 paper plate, light blue paint, red paper, white paper, cotton balls, 1 red ribbon bow, white glue
How to make it
- You cut out the middle of the plate to leave a ring.
- Your child paints the ring light blue. Let it dry.
- Cut red mittens and white snowflakes. Your child glues them and the cotton balls around the ring, spaced out and mixed up.
- Glue the red ribbon bow at the top.
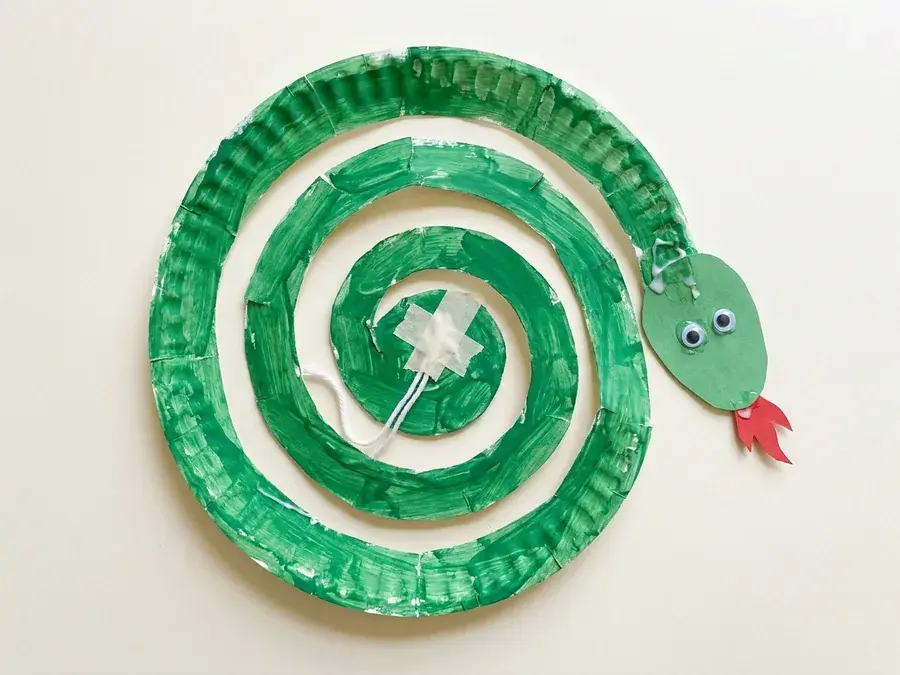
16. Paper plate dragon twirler
The child paints a paper plate, it is cut into a spiral and a dragon head is glued to the end so it spins when hung.
Fits January: Chinese New Year and Letter D.
You need: 1 paper plate, green paint, green paper, red paper, 2 googly eyes, 1 short piece of string, tape and glue
How to make it
- Your child paints the plate green. Let it dry.
- Cut the plate in one long spiral from the rim to the middle.
- Cut a green oval and glue it on the outer end as the head, with 2 googly eyes and a small red paper flame at the tip.
- Tape the string to the middle of the spiral.
- Hold up the string and watch the dragon twirl.
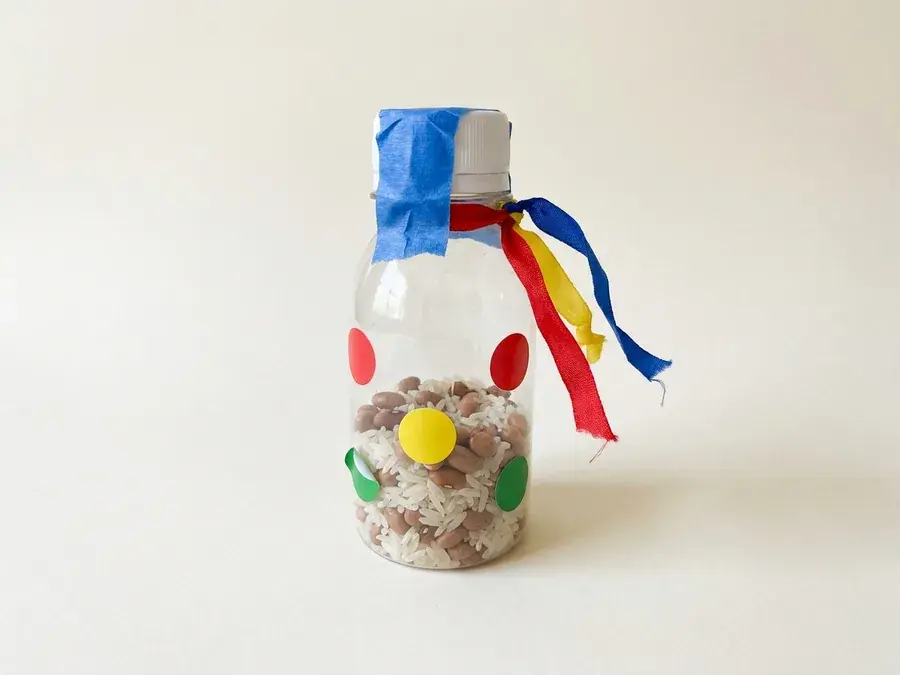
17. Shaker noise maker
The child fills a bottle or two taped paper plates with rice or beans, seals it and decorates it with streamers.
Fits January: New Year's and Letter N.
You need: 1 small clear plastic bottle with cap, dry rice, dry beans, tape, dot stickers, short ribbons
How to make it
- Your child pours rice and beans into the bottle until it is about one third full.
- Screw the cap on and wrap tape around it to seal it.
- Stick dot stickers on the outside of the bottle.
- Tie short ribbons around the neck so their ends hang down.
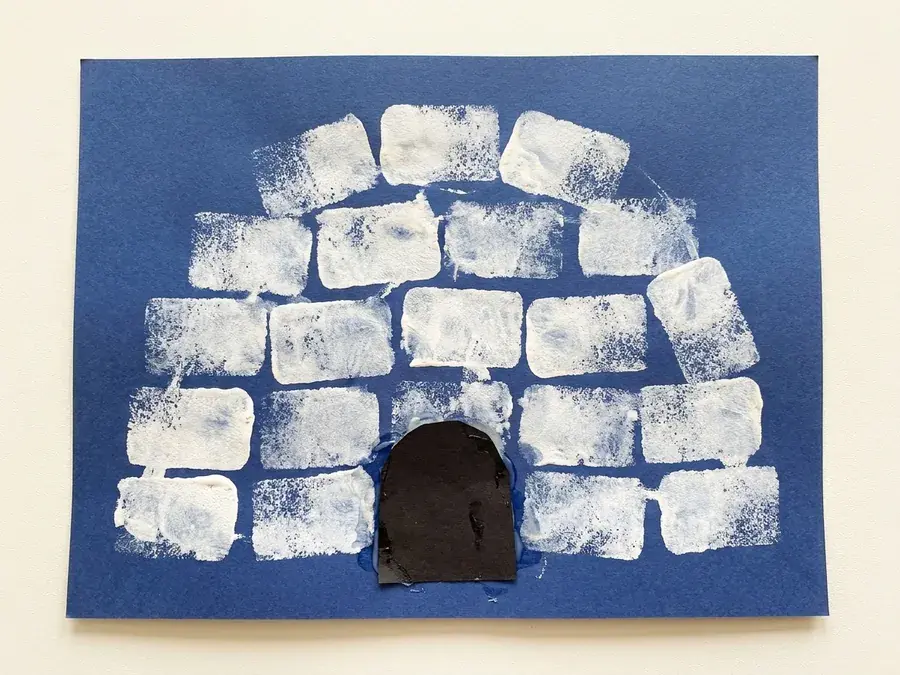
18. Sponge print igloo
The child stamps white paint rectangles with a sponge in a dome shape on dark paper to build an igloo.
Fits January: Letter I.
You need: 1 sheet of dark blue construction paper, white poster paint, 1 small rectangular sponge, black paper, glue
How to make it
- Your child dips the sponge in white paint and stamps a row of blocks near the bottom of the dark blue paper.
- Stamp more rows above it, each row shorter than the last, so the blocks build a dome. Let the paint dry.
- You cut a small black arch and glue it at the bottom centre of the dome as the doorway.
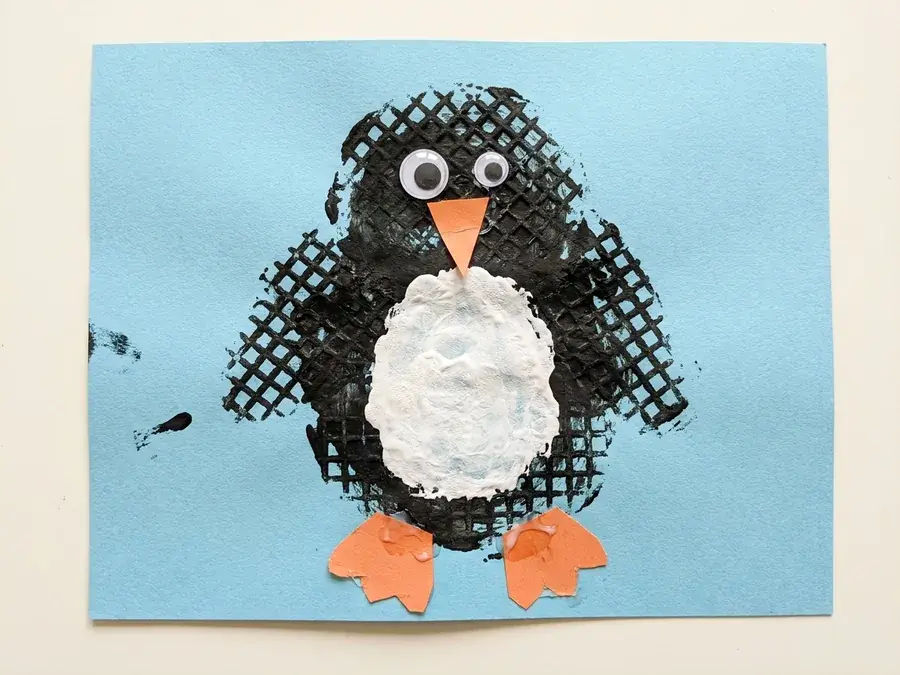
19. Potato masher penguin
The child stamps a potato masher or halved potato in black paint for the body and adds a painted belly and paper details.
Fits January: Penguin.
You need: 1 potato masher, black paint, white paint, 1 small sponge, light blue paper, orange paper, 2 googly eyes and glue
How to make it
- Your child dips the masher in black paint and stamps a tall oval body on the light blue paper, twice, overlapping.
- Dab a white oval tummy on with the small sponge. Let it dry.
- Cut an orange triangle beak and 2 orange feet. Glue the 2 googly eyes near the top and the beak between them.
- Glue the 2 feet at the bottom.
Nothing matches that filter. Clear it and try again.
Easy january crafts for preschoolers: the 3 a young three can do
These 3 need no exact cutting and no small pieces, so a young three can do most of it alone: Cotton ball snowman, Fork painted fireworks, Ice painting.
Doing January crafts with a 3 year old
First week: the fork painted fireworks for New Year and the cotton ball snowman. Both take one sheet of paper, one kind of paint or a glue stick, and no cutting. A three year old does both alone.
The coffee filter snowflake and the paper lantern need an adult for the folding and the first snips. Fold together, then hand over child scissors. A five year old can snip the notches alone and open the snowflake up.
Ice painting is the one to save for a cold afternoon. Freeze colored water with a craft stick in each cube the night before, lay a towel down and let your child paint with the ice on thick paper.
Hang the snowflakes in a window and line the penguins and polar bears up on the fridge. The pinecone bird feeder goes outside, and your child can watch from the window for birds.
What you need for January crafts
Most of these use the same handful of supplies: glue, black paper, orange paper, googly eye, black marker, light blue paper, cotton ball, black paint. Everything else is named on the craft it belongs to.
Free · 30 questions · about 4 minutes Before you go: see where your child is for kindergarten A report with every area at a glance, what to focus on first, and things to do at home. Get my child's free report →More crafts for preschoolers
- Winter crafts for preschoolers
- Christmas crafts for preschoolers
- February crafts for preschoolers
- Snowman crafts for preschoolers
- Crafts for 4 year olds
- Letter S crafts for preschoolers
- Penguin crafts for preschoolers
- Snowflake crafts for preschoolers
- All crafts for preschoolers, by theme, holiday and letter